DataHub Cloud Chrome Extension
Installing the Extension
In order to use the DataHub Cloud Chrome extension, you need to download it onto your browser from the Chrome web store here.
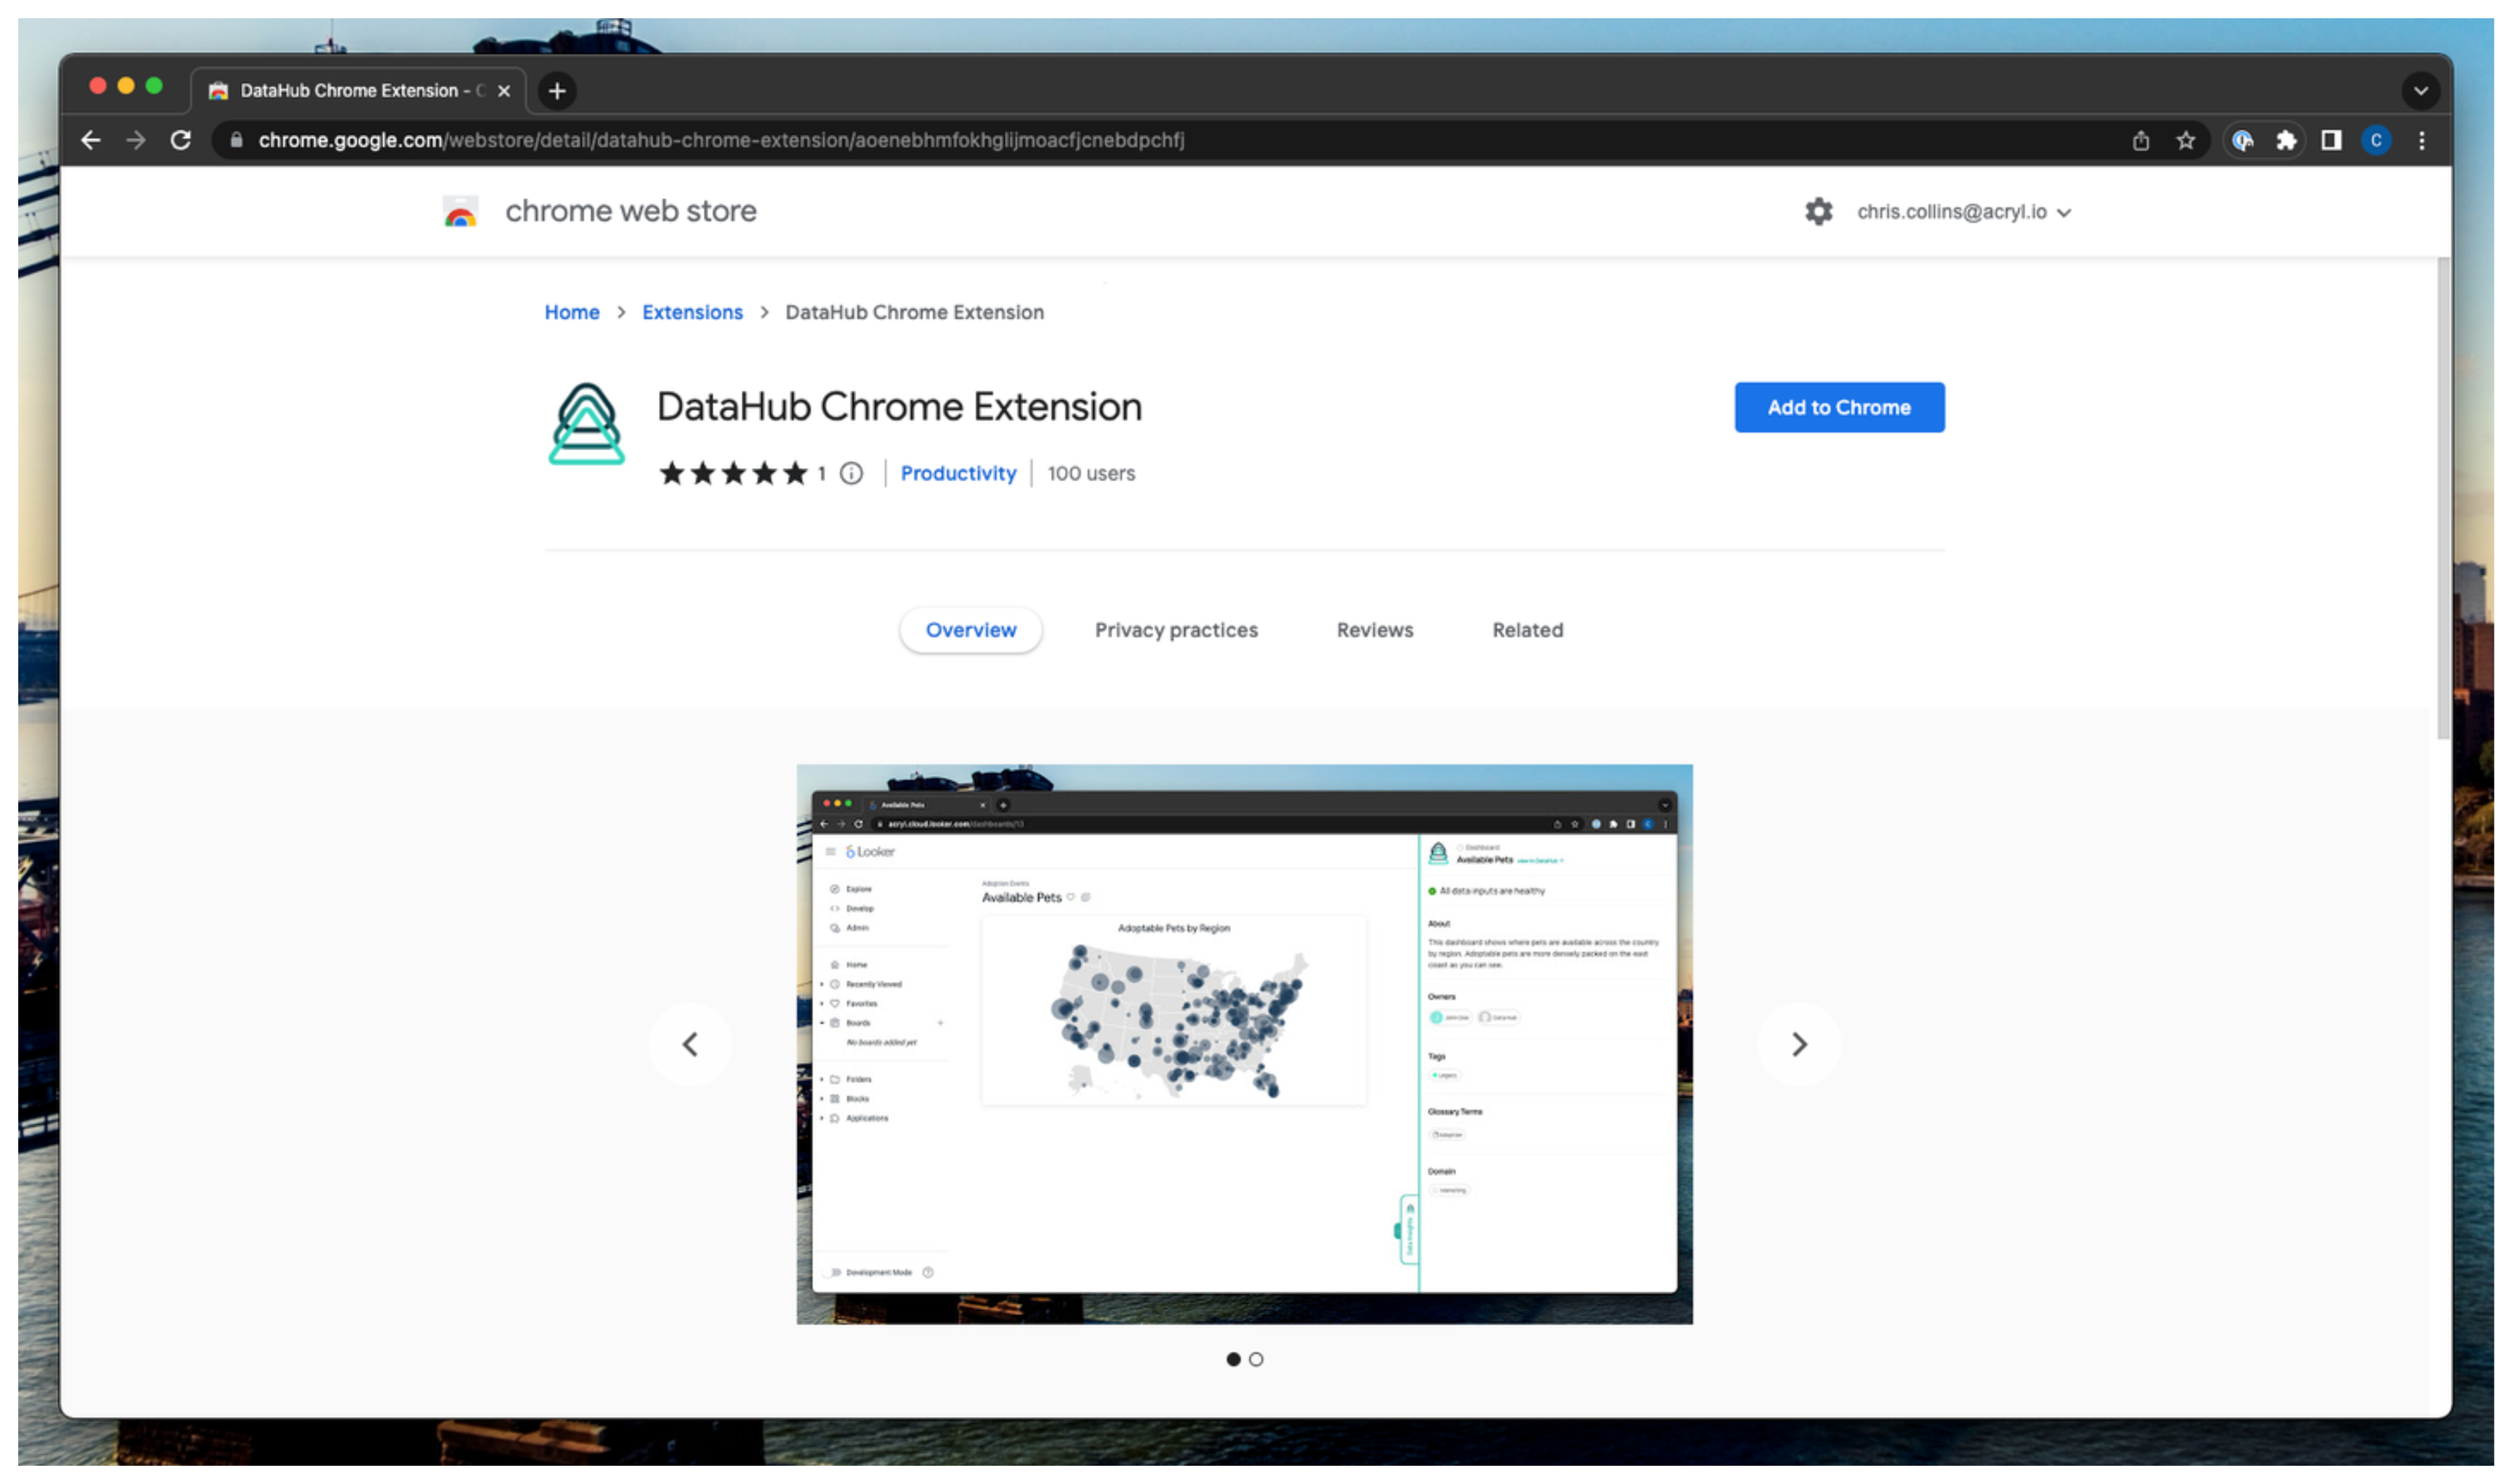
Simply click "Add to Chrome" then "Add extension" on the ensuing popup.
Configuring the Extension
Once you have your extension installed, you'll need to configure it to work with your DataHub Cloud deployment.
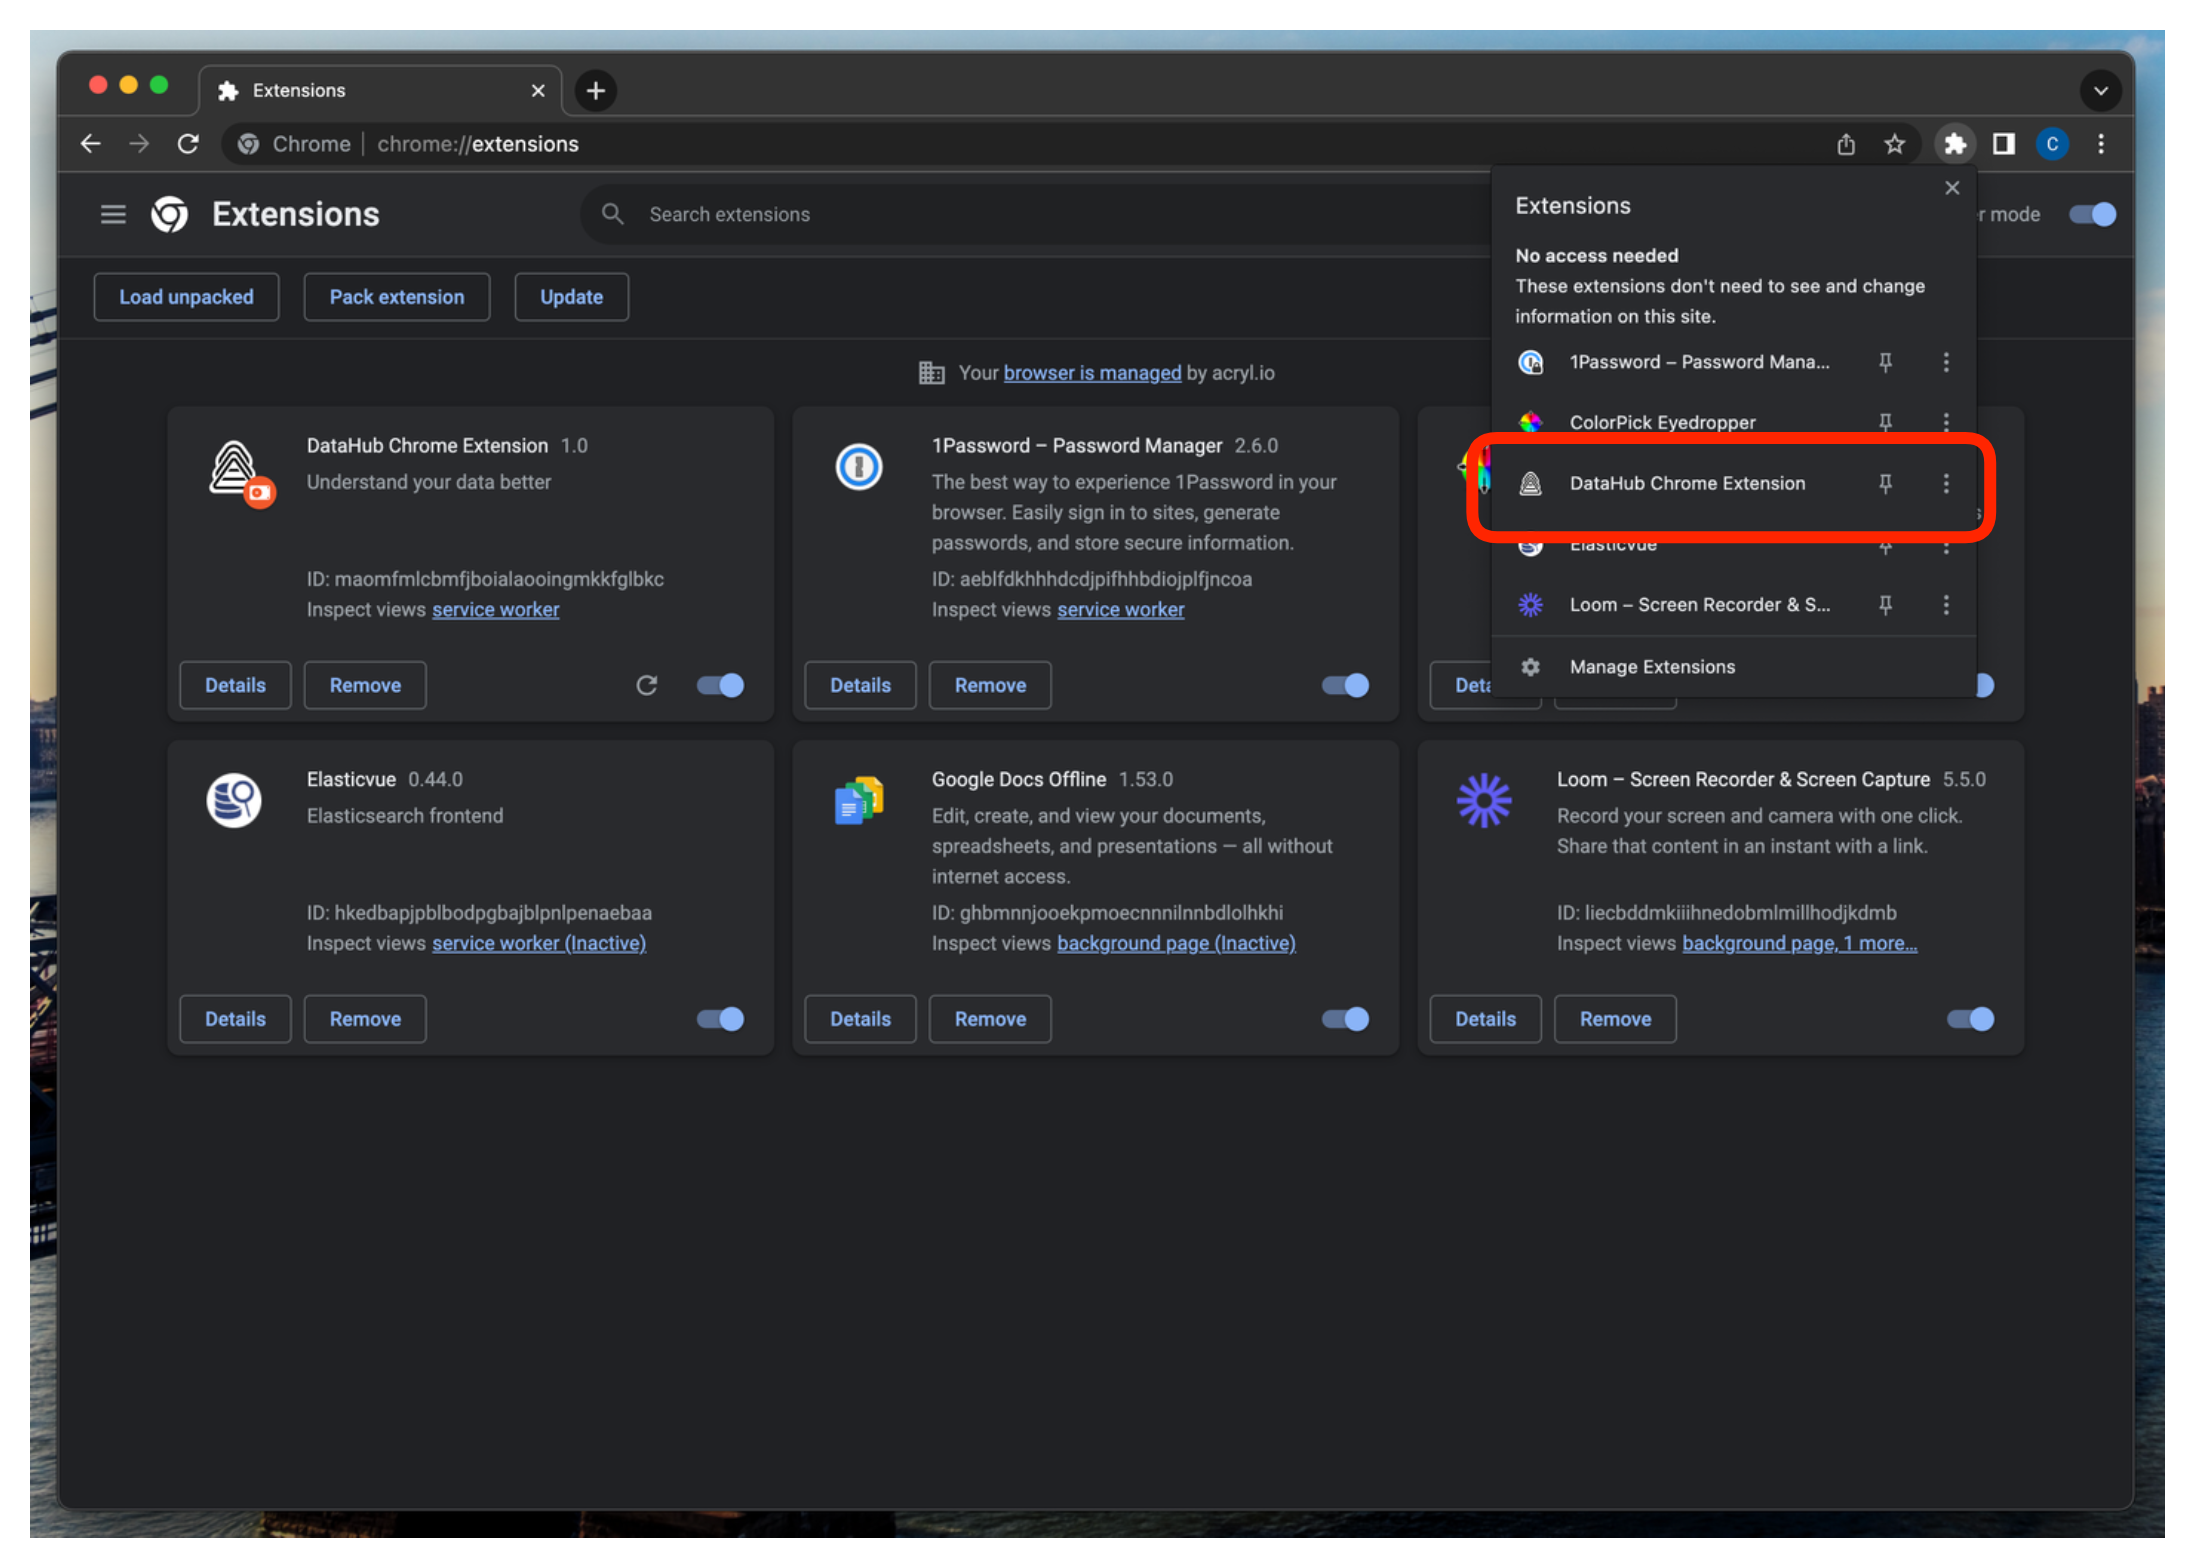
- Click the extension button on the right of your browser's address bar to view all of your installed extensions. Click on the newly installed DataHub extension.
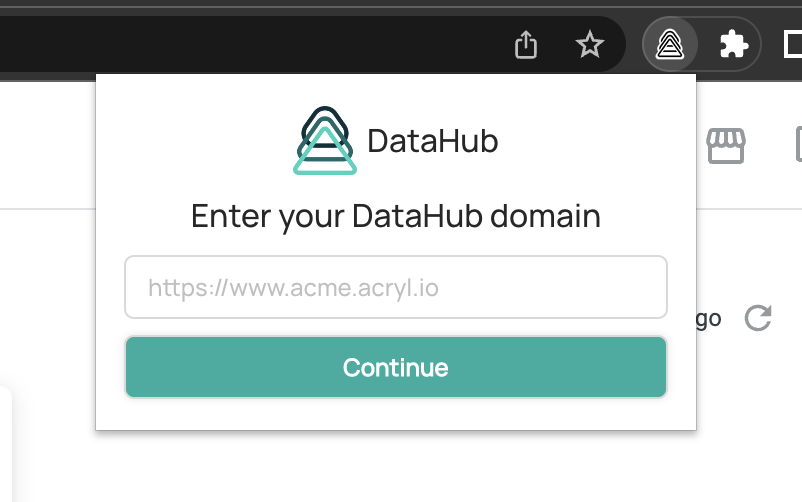
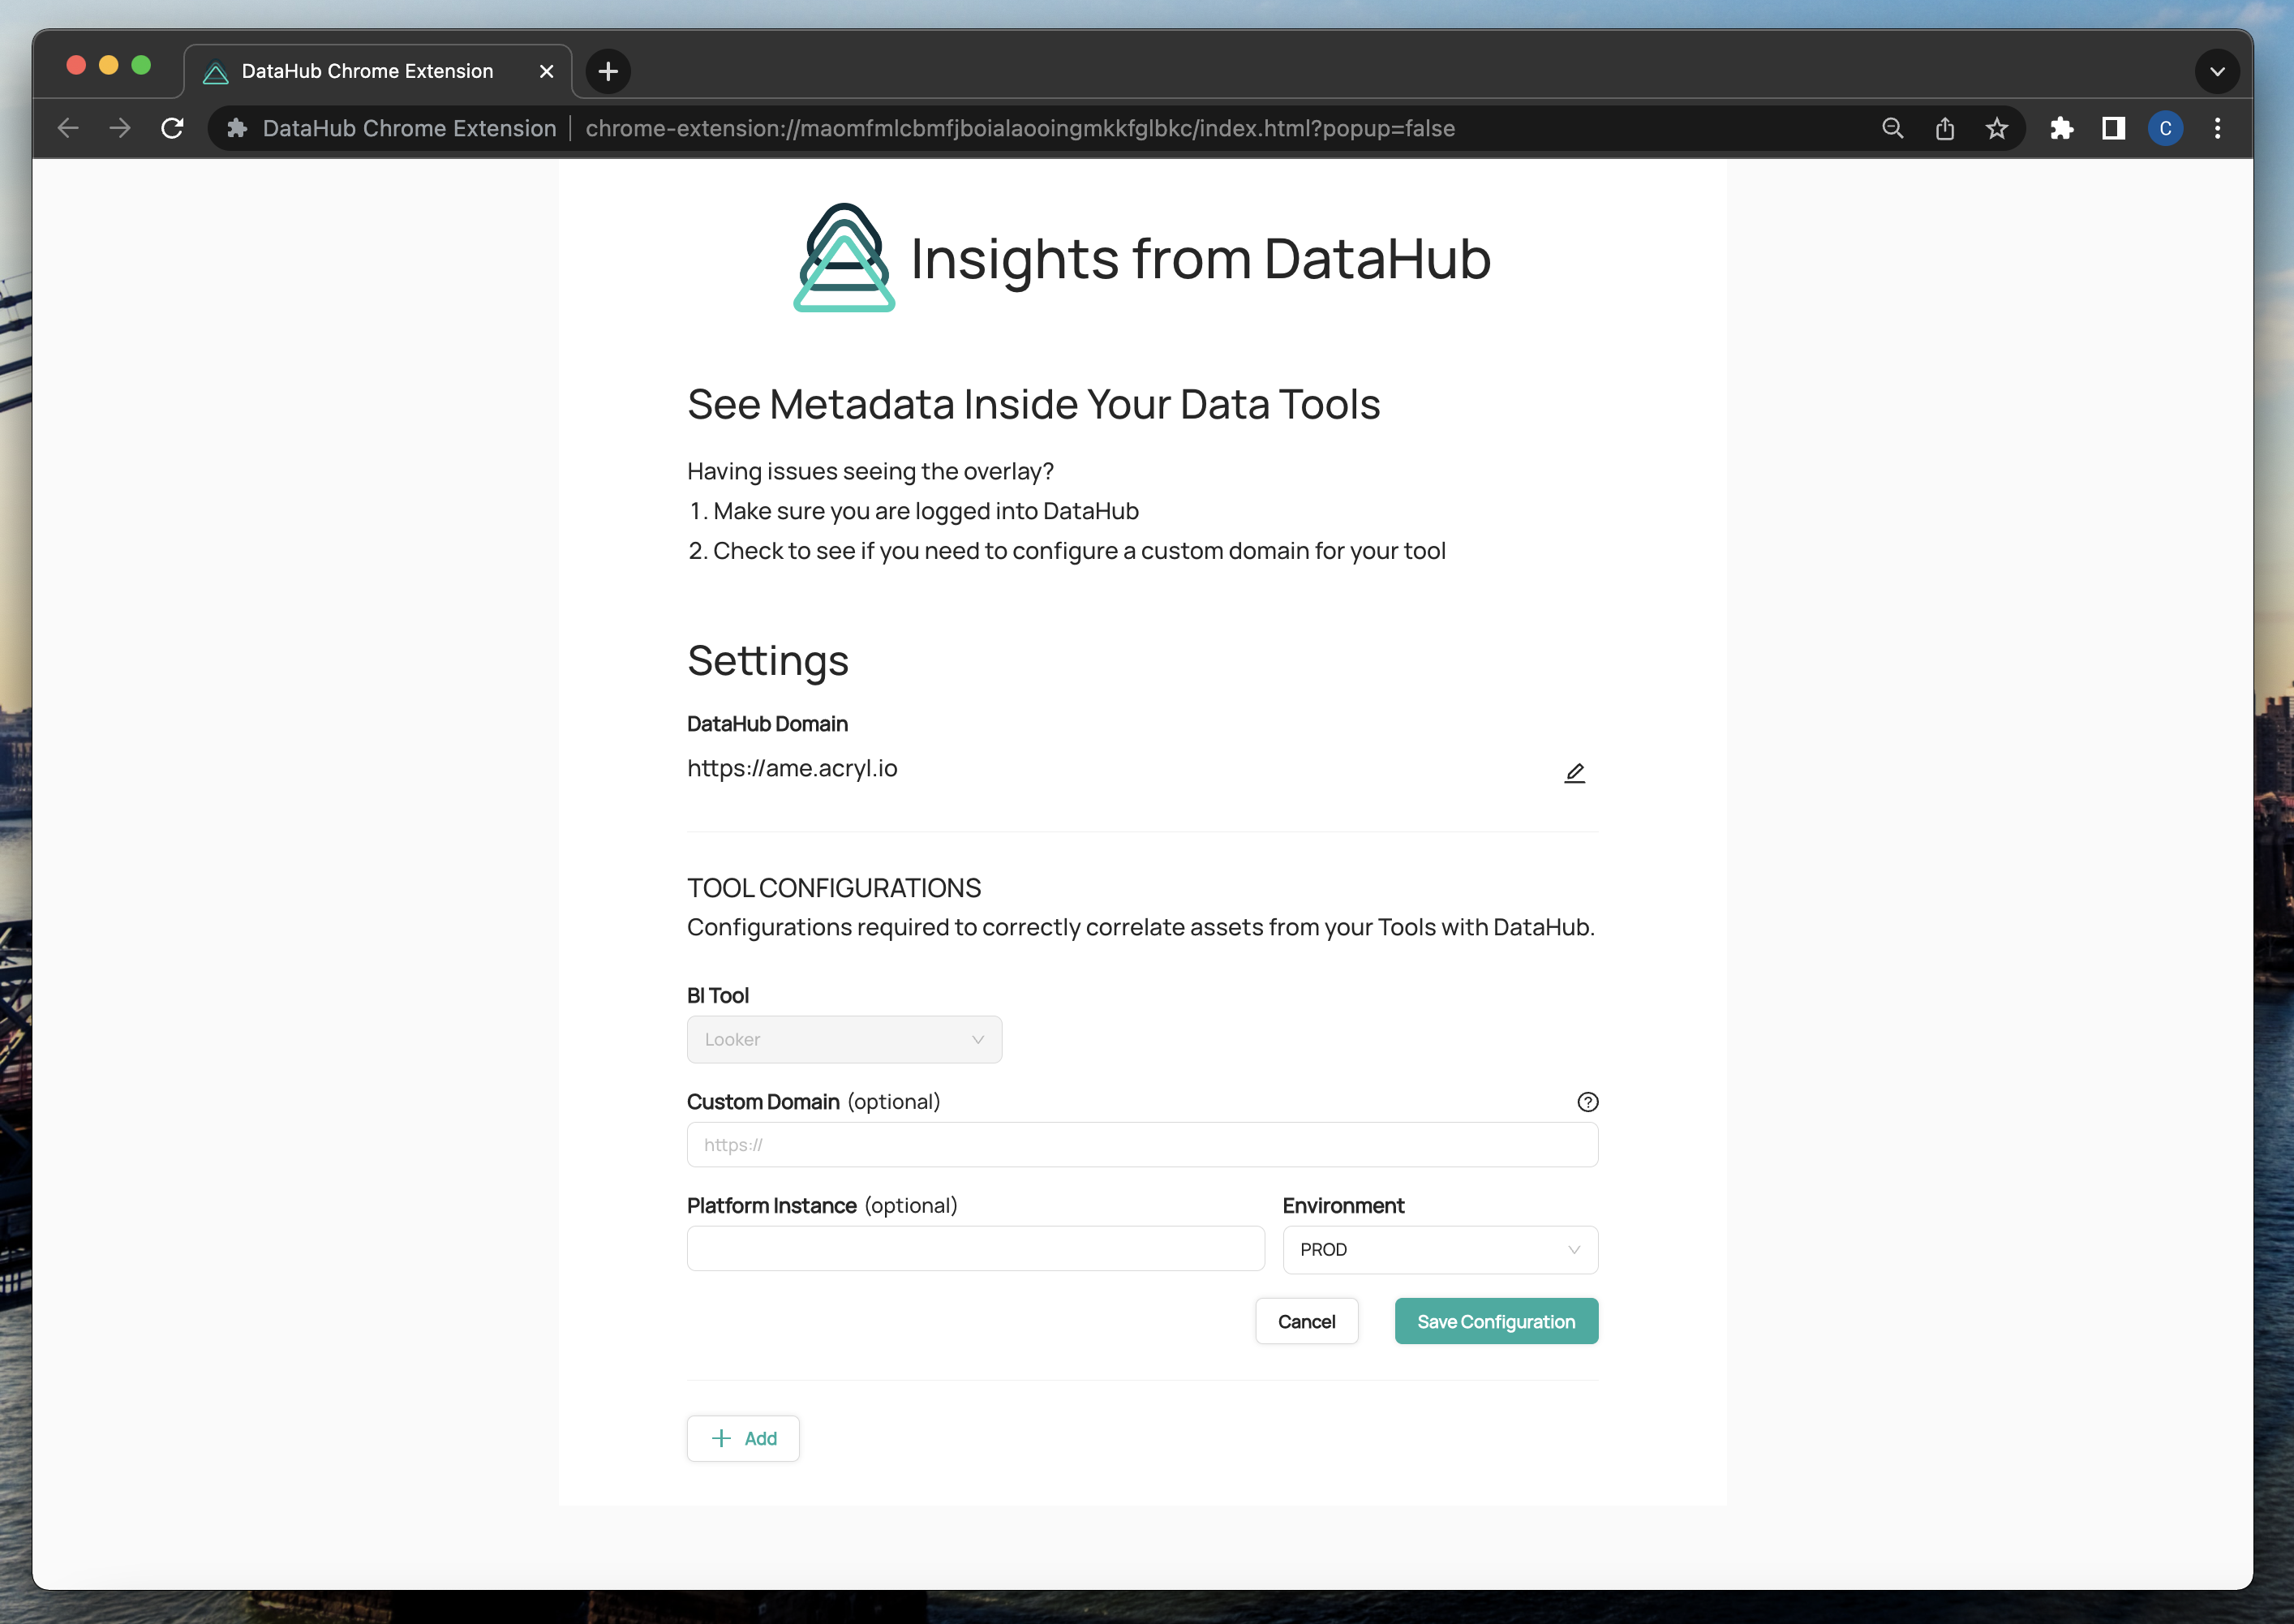
- Fill in your DataHub domain and click "Continue" in the extension popup that appears.
If your organization uses standard SaaS domains for Looker, you should be ready to go!
Additional Configurations
Some organizations have custom SaaS domains for Looker and some DataHub Cloud deployments utilize Platform Instances and set custom Environments when creating DataHub assets. If any of these situations applies to you, please follow the next few steps to finish configuring your extension.
- Click on the extension button and select your DataHub extension to open the popup again. Now click the settings icon in order to open the configurations page.
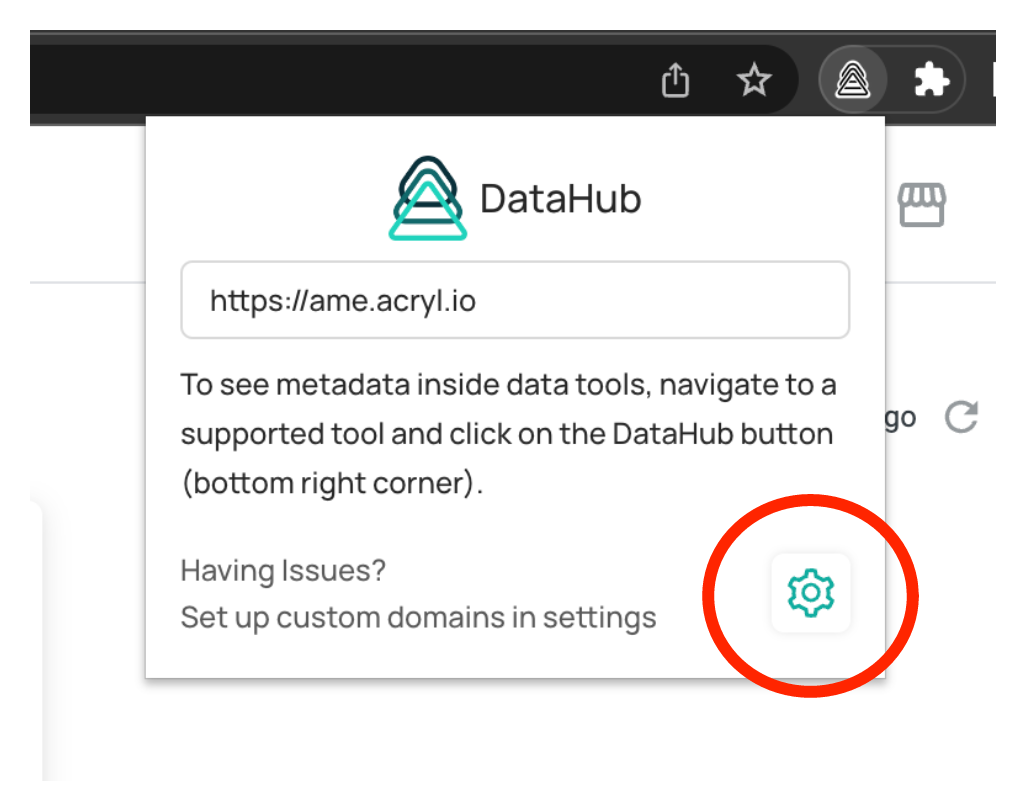
- Fill out any and save custom configurations you have in the TOOL CONFIGURATIONS section. Here you can configure a custom domain, a Platform Instance associated with that domain, and the Environment set on your DataHub assets. If you don't have a custom domain but do have a custom Platform Instance or Environment, feel free to leave the field domain empty.
Using the Extension
Once you have everything configured on your extension, it's time to use it!
First ensure that you are logged in to your DataHub Cloud instance.
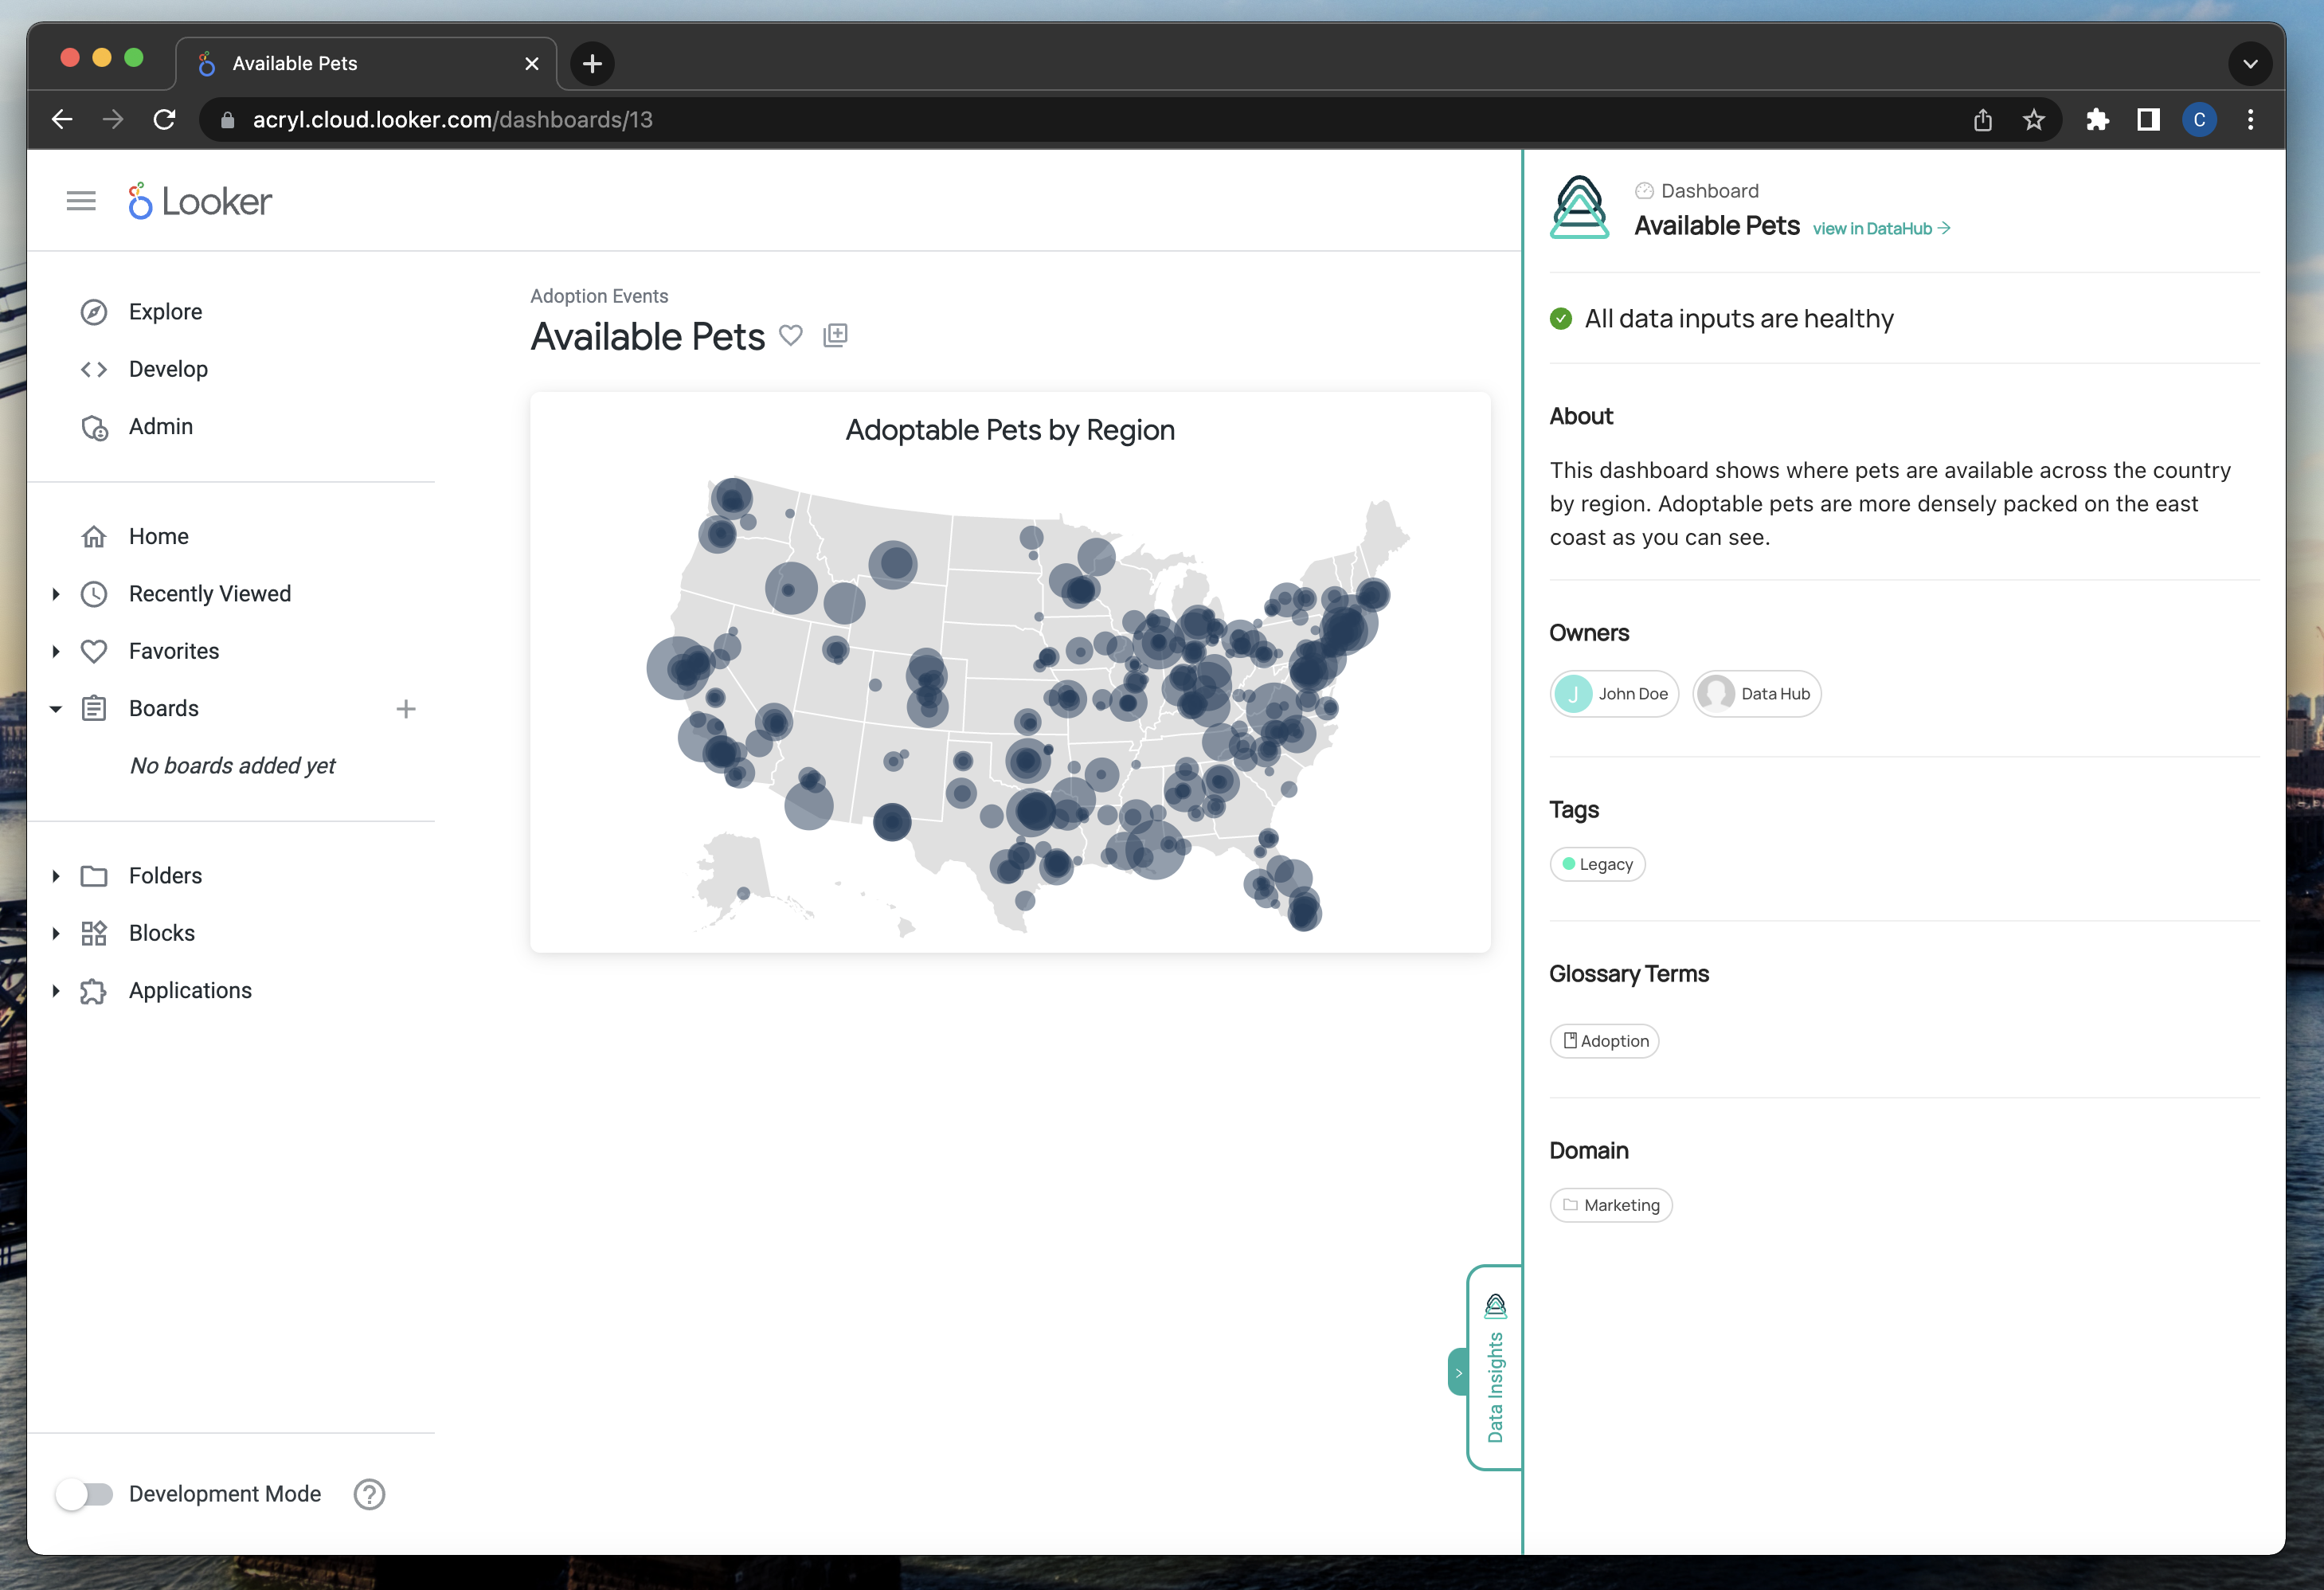
Navigate to Looker or Tableau and log in to view your data assets.
Navigate to a page where DataHub can provide insights on your data assets (Dashboards and Explores).
Click the DataHub Cloud extension button on the bottom right of your page to open a drawer where you can now see additional information about this asset right from your DataHub instance.
Advanced: Self-Hosted DataHub
If you are using the DataHub Cloud Chrome extension for your self-hosted DataHub instance, everything above is applicable. However, there is one additional step you must take in order to set up your instance to be compatible with the extension.
Configure Auth Cookies
In order for the Chrome extension to work with your instance, it needs to be able to make authenticated requests. Therefore, authentication cookies need to be set up so that they can be shared with the extension on your browser. You must update the values of two environment variables in your datahub-frontend container:
AUTH_COOKIE_SAME_SITE="NONE"
AUTH_COOKIE_SECURE=true
Once your re-deploy your datahub-frontend container with these values, you should be good to go!