Configuring Authorization with Apache Ranger
DataHub integration with Apache Ranger allows DataHub Authorization policies to be controlled inside Apache Ranger. Admins can create users, groups and roles on Apache Ranger, and then assign them to Ranger policies to control the authorization of requests to DataHub.
We'll break down configuration of the DataHub Apache Ranger Plugin into two parts:
- Configuring your Apache Ranger Deployment
- Configuring your DataHub Deployment
Disclaimer: All configurations shown in this documented were tested against Privacera Platform v6.3.0.1.
Prerequisites
- User identifier present in CorpRole URN should be the name of the AD/LDAP user. For example in URN urn:li:corpuser:datahub, the datahub should present as name of user in AD/LDAP
- Apache Ranger and DataHub are configured for authentication via same IDP (either LDAP + JaaS or OIDC SSO)
- Apache Ranger service available via HTTP
- Basic authentication is enabled on Apache Ranger Service
Configuration
Configuring your Apache Ranger Deployment
Perform the following steps to configure an Apache Ranger deployment to support creating access policies compatible with DataHub. For kubernetes example command, please replace the <ranger-pod-name> and <namespace> as per your environment.
Download the datahub-ranger-plugin from Maven
Create a "datahub" directory inside the "ranger-plugins" directory where Apache Ranger is deployed. For example, to do this in a Privacera container
Docker command:
docker exec privacera_ranger_1 mkdir ews/webapp/WEB-INF/classes/ranger-plugins/datahubKubernetes command:
kubectl exec <ranger-pod-name> mkdir ews/webapp/WEB-INF/classes/ranger-plugins/datahub -n <namespace>Copy the downloaded datahub-ranger-plugin jar into the newly created "datahub" directory. For example, to do this in a Privacera container
Docker command:
docker cp datahub-ranger-plugin-<version>.jar privacera_ranger_1:/opt/ranger/ranger-2.1.0-admin/ews/webapp/WEB-INF/classes/ranger-plugins/datahub/Kubernetes command:
kubectl cp datahub-ranger-plugin-<version>.jar <ranger-pod-name>:/opt/ranger/ranger-2.1.0-admin/ews/webapp/WEB-INF/classes/ranger-plugins/datahub/ -n <namespace>Download the service definition file. This service definition is the ranger service definition JSON file for datahub-ranger-plugin-<version>.jar
Register the downloaded service definition file with Apache Ranger Service. To do this executes the below curl command
Replace variables with corresponding values in curl command- <ranger-admin-username>
- <ranger-admin-password>
- <ranger-host>
curl -u <ranger-admin-username>:<ranger-admin-password> -X POST -H "Accept: application/json" -H "Content-Type: application/json" --data @servicedef.json http://<ranger-host>:6080/service/public/v2/api/servicedef
Defining a Ranger Policy
Now, you should have the DataHub plugin registered with Apache Ranger. Next, we'll create a sample user and add them to our first resource policy.
Login into the Apache Ranger UI (Privacera Portal) to performs below steps.
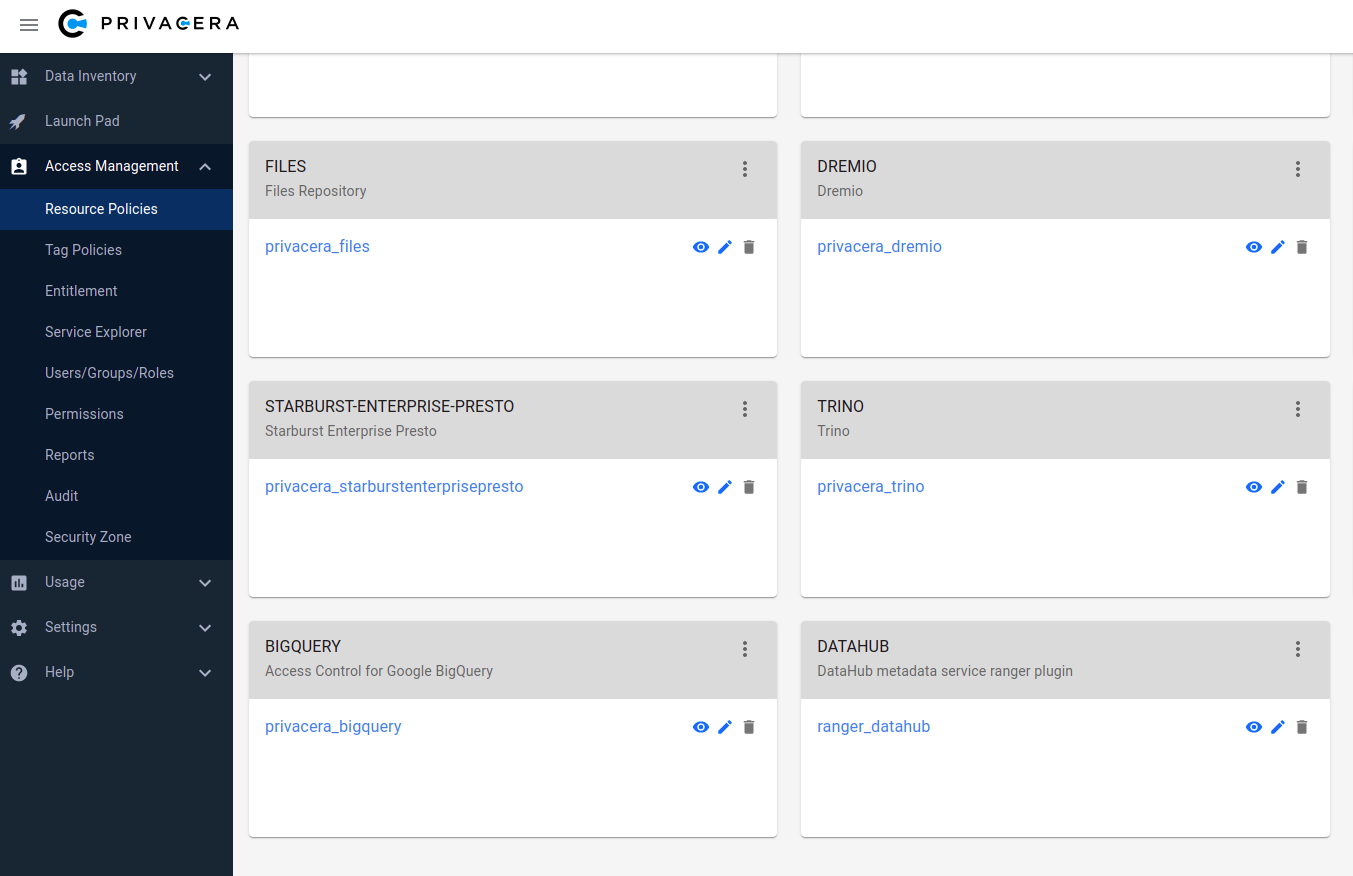
Verify datahub-ranger-plugin is registered successfully: The datahub-ranger-plugin should be visible as DATAHUB in Access Management -> Resource Policies.
Create a service under the plugin DATAHUB with name ranger_datahub
DATAHUB plugin and ranger_datahub service is shown in below screenshot:
Create a new policy under service ranger_datahub - this will be used to control DataHub authorization.
Create a test user & assign them to a policy. We'll use the
datahubuser, which is the default root user inside DataHub.To do this performs below steps
Create a user datahub
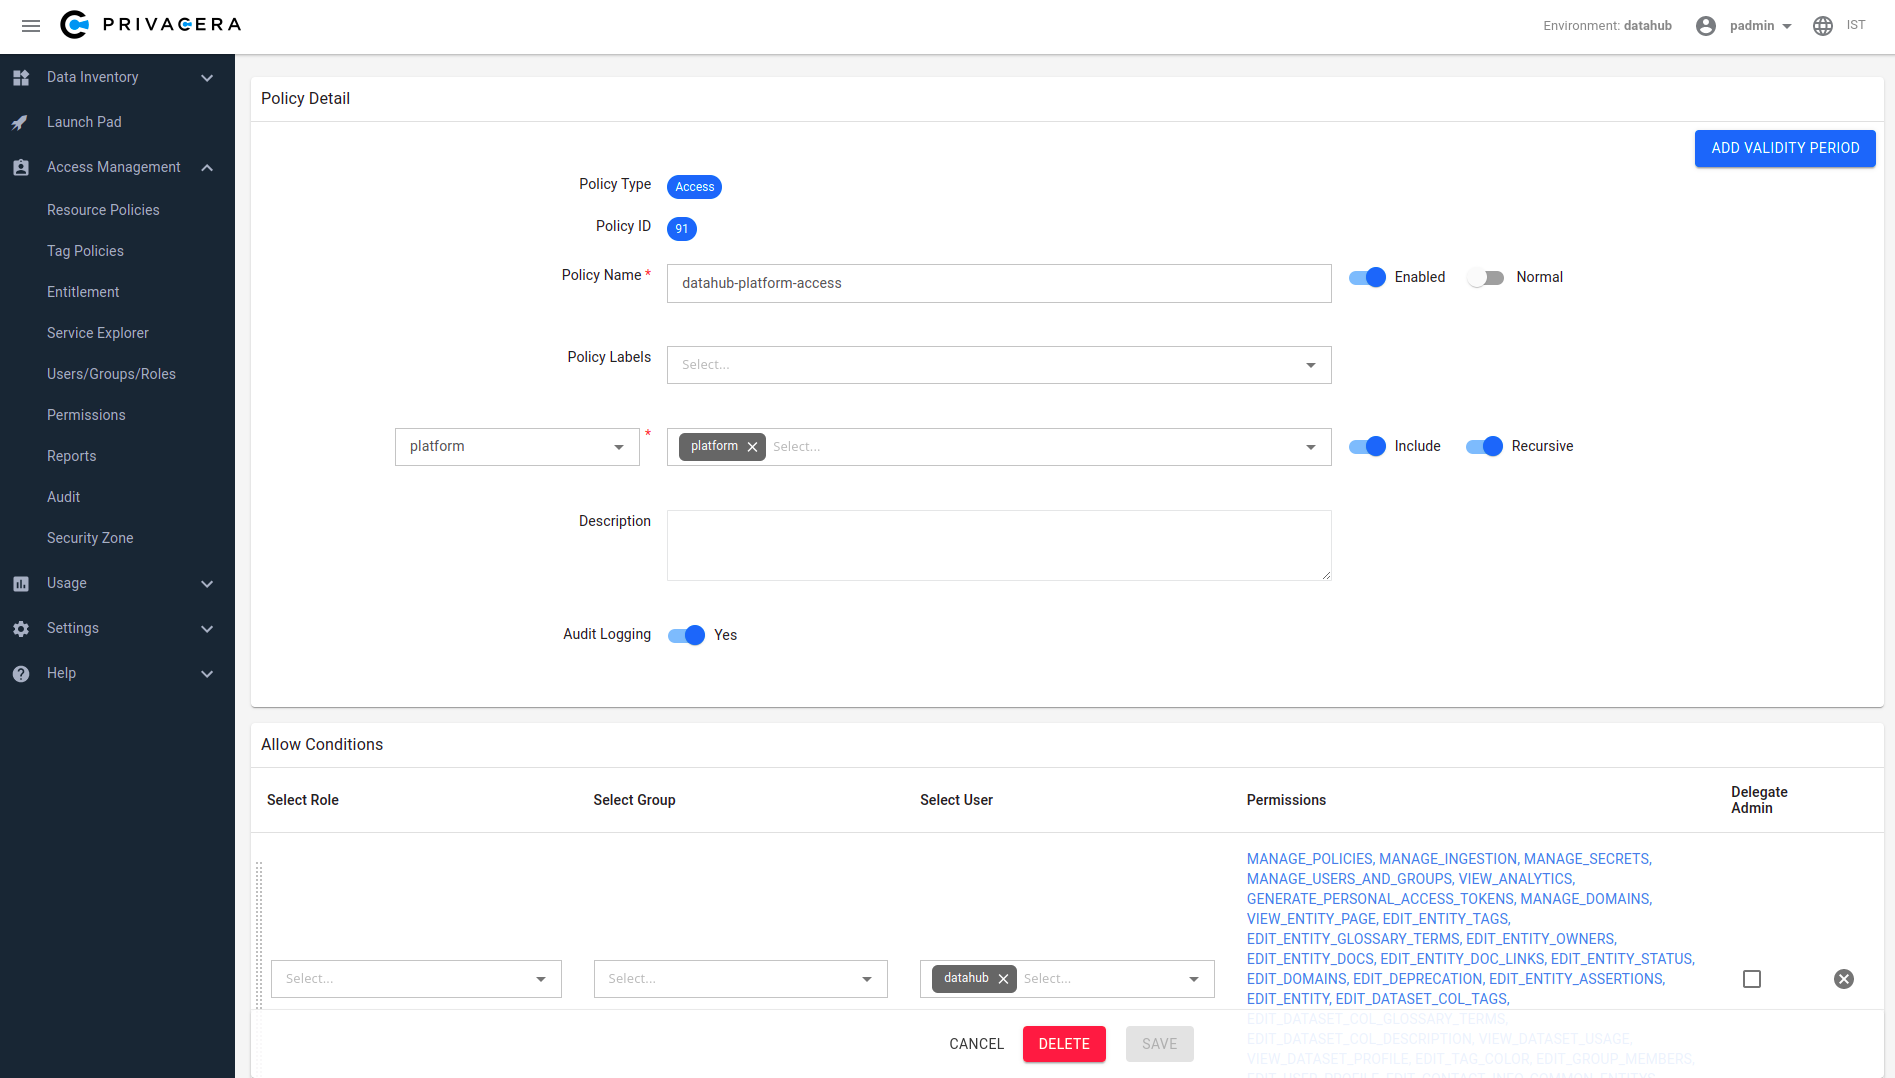
Create a policy under ranger_datahub service. To assign Platform Privileges (e.g. Admin privileges), simply use the "platform" resource type which is defined. To test the flow, we can simply assign the datahub user all platform privileges that are available through the Ranger UI. This will enable the "datahub" to have full platform admin privileges.
To define fine-grained resource privileges, e.g. for DataHub Datasets, Dashboards, Charts, and more, you can simply select the appropriate Resource Type in the Ranger policy builder. You should also see a list of privileges that are supported for each resource type, which correspond to the actions that you can perform. To learn more about supported privileges, check out the DataHub Policies Guide.
DataHub platform access policy screenshot:
Once we've created our first policy, we can set up DataHub to start authorizing requests using Ranger policies.
Configuring your DataHub Deployment
Perform the following steps to configure DataHub to send incoming requests to Apache Ranger for authorization.
- Download Apache Ranger security xml ranger-datahub-security.xml
- In ranger-datahub-security.xml edit the value of property ranger.plugin.datahub.policy.rest.url. Sample snippet is shown below
    <property>
        <name>ranger.plugin.datahub.policy.rest.url</name>
        <value>http://199.209.9.70:6080</value>
        <description>
            URL to Ranger Admin
        </description>
    </property>
As per your deployment follow either Docker or Kubernetes section below
Docker
Build Ranger Authorizer Plugin
Clone DataHub Repo: Clone the DataHub repository
    cd ~/
    git clone https://github.com/acryldata/datahub-ranger-auth-plugin.git
Go inside the datahub directory: You should be inside the
datahub-ranger-auth-plugindirectory to execute build commandcd ~/datahub-ranger-auth-plugin/Build plugin: Execute below gradle command to build Ranger Authorizer Plugin jar
./gradlew apache-ranger-plugin:shadowJarThis step will generate a jar file i.e. ./apache-ranger-plugin/build/libs/apache-ranger-plugin-<version>-SNAPSHOT.jar.
Let's call this jar as ranger-plugin-jar. We need this jar in below step (Configure Ranger Authorizer Plugin)
Configure Ranger Authorizer Plugin
On the host where datahub-gms is deployed, follow these steps:
- Create directory
~/.datahub/plugins/auth/apache-ranger-authorizer/: Executes below commandmkdir -p ~/.datahub/plugins/auth/apache-ranger-authorizer/ - Copy
ranger-datahub-security.xmlfile to~/.datahub/plugins/auth/apache-ranger-authorizer/ - Copy ranger-plugin-jar: Copy the apache-ranger-plugin-<version>-SNAPSHOT.jar
cp ./apache-ranger-plugin/build/libs/apache-ranger-plugin-<version>-SNAPSHOT.jar ~/.datahub/plugins/auth/apache-ranger-authorizer/apache-ranger-authorizer.jar - Create
config.yml: Create config.yml if not existtouch ~/.datahub/plugins/auth/config.yml - Set Apache Ranger Plugin config: Add below entry in config.yml file. Set username and password to Apache Ranger user credentials
   plugins:
     - name: "apache-ranger-authorizer"
       type: "authorizer"
       enabled: "true"
       params:
         className: "com.datahub.authorization.ranger.RangerAuthorizer"
         configs:
           username: "<Apache Ranger username>"
password: "<Apache Ranger password>" - Restart DataHub GMS container (i.e.
datahub-gms)
Kubernetes
Helm support is coming soon.
That's it! Now we can test out the integration.
Validating your Setup
To verify that things are working as expected, we can test that the root datahub user has all Platform Privileges and is able to perform all operations: managing users & groups, creating domains, and more. To do this, simply log into your DataHub deployment via the root DataHub user.
Revert the Configuration
If you want to revert your deployment configuration and don't want Apache Ranger to control the authorization of your DataHub deployment then follow the below sections to undo the configuration steps you have performed in section Configuring Authorization with Apache Ranger
- Revert Configuration of your Apache Ranger Deployment
- Revert Configuration of your DataHub Deployment
Revert Configuration of your Apache Ranger Deployment
For kubernetes example command, please replace the <ranger-pod-name> and <namespace> as per your environment.
Delete ranger_datahub service: Login into the Privacera Portal and delete service ranger_datahub
ranger_datahub service is shown in below screenshot:
Delete datahub plugin: Execute below curl command to delete datahub plugin Replace variables with corresponding values in curl command
- <ranger-admin-username>
- <ranger-admin-password>
- <ranger-host>
curl -u <ranger-admin-username>:<ranger-admin-password> -X DELETE -H "Accept: application/json" -H "Content-Type: application/json" http://<ranger-host>:6080/service/public/v2/api/servicedef/name/datahubDelete datahub plugin directory: Execute below command to delete the datahub plugin directory from Apache Ranger
Docker command:
docker exec privacera_ranger_1 rm -rf ews/webapp/WEB-INF/classes/ranger-plugins/datahubKubernetes command:
kubectl exec <ranger-pod-name> -n <namespace> -- sh -c 'rm -rf ews/webapp/WEB-INF/classes/ranger-plugins/datahub'
Revert Configuration of your DataHub Deployment
Docker
- Remove Apache Ranger Plugin entry: From
config.ymlfile remove the entry which was added for Apache Ranger Plugin - Redeploy DataHub (
datahub-gms)
Kubernetes
For kubernetes example command, please replace the <namespace> as per your environment.
- Open deployment editor: Execute below command
kubectl edit deployment datahub-datahub-gms -n <namespace> - Remove below environments variables
- AUTH_POLICIES_ENABLED
- RANGER_AUTHORIZER_ENABLED
- RANGER_USERNAME
- RANGER_PASSWORD
- Remove below volumes related settings
- volumes
- volumeMounts
- Save and quit the editor and use below command to check status of datahub-datahub-gms deployment rolloutOn successful rollout you should see a message deployment "datahub-datahub-gms" successfully rolled out
kubectl rollout status deployment/datahub-datahub-gms -n <namespace>
Validating your Setup
To verify that things are working as expected, we can test that the root datahub user has all Platform Privileges and is able to perform all operations: managing users & groups, creating domains, and more. To do this, simply log into your DataHub deployment via the root DataHub user.