PowerBI Ingestion Guide: Setup & Prerequisites
In order to configure ingestion from PowerBI, you'll first have to ensure you have an Azure AD app with permission to access the PowerBI resources.
PowerBI Prerequisites
Create an Azure AD app: Follow below steps to create an Azure AD app
a. Login to https://portal.azure.com
b. Go to
Azure Active Directoryc. Navigate to
App registrationsd. Click on
+ New registratione. On
Register an applicationwindow fill theNameof application sayspowerbi-app-connectorand keep other default as is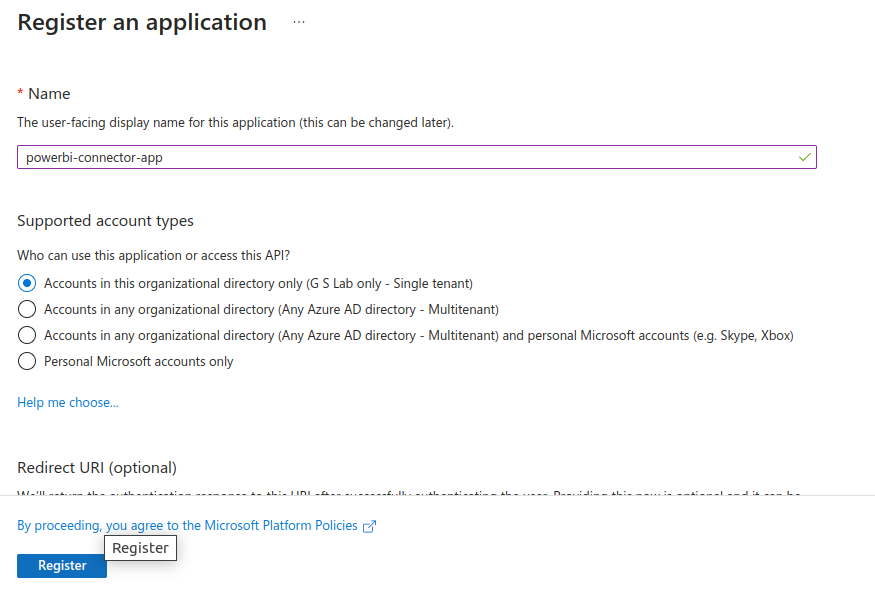
f. On
Register an applicationwindow click onRegisterg. The Azure portal will open up the
powerbi-app-connectorwindow as shown below. On this screen note down theApplication (client) IDand click onAdd a certificate or secretto generate a secret for theApplication (client) ID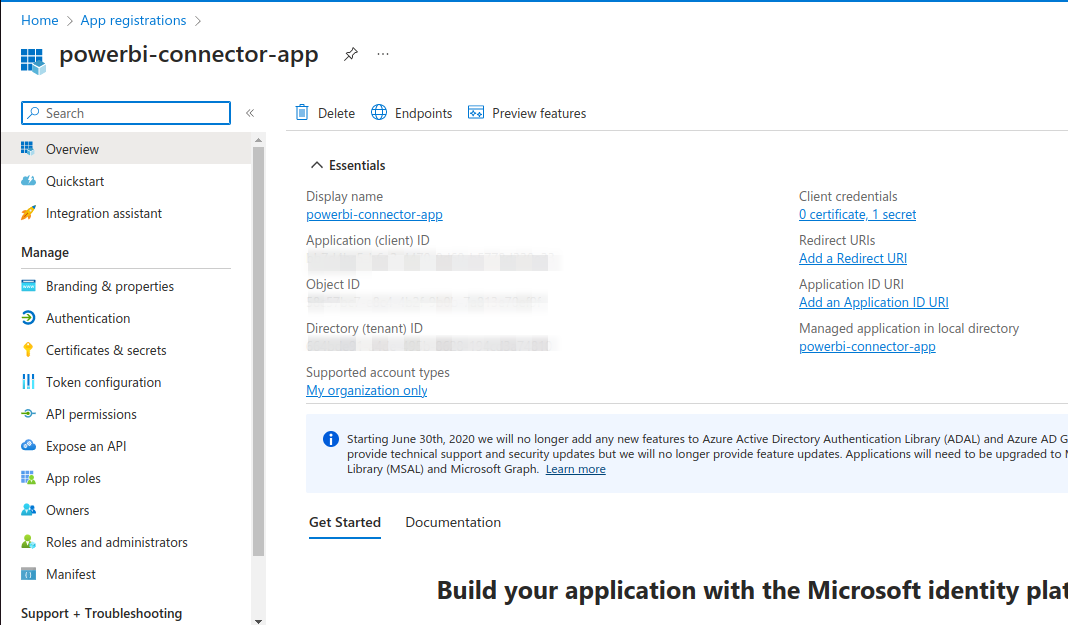
f. On
powerbi-connector-app | Certificates & secretswindow generate the client secret and note down theSecretCreate an Azure AD Security Group: You need to add the
Azure AD appinto the security group to control resource permissions for theAzure AD app. Follow below steps to create an Azure AD Security Group.a. Go to
Azure Active Directoryb. Navigate to
Groupsand click onNew groupc. On
New groupwindow fill out theGroup type,Group name,Group description.Group typeshould be set toSecurity.New groupwindow is shown in below screenshot.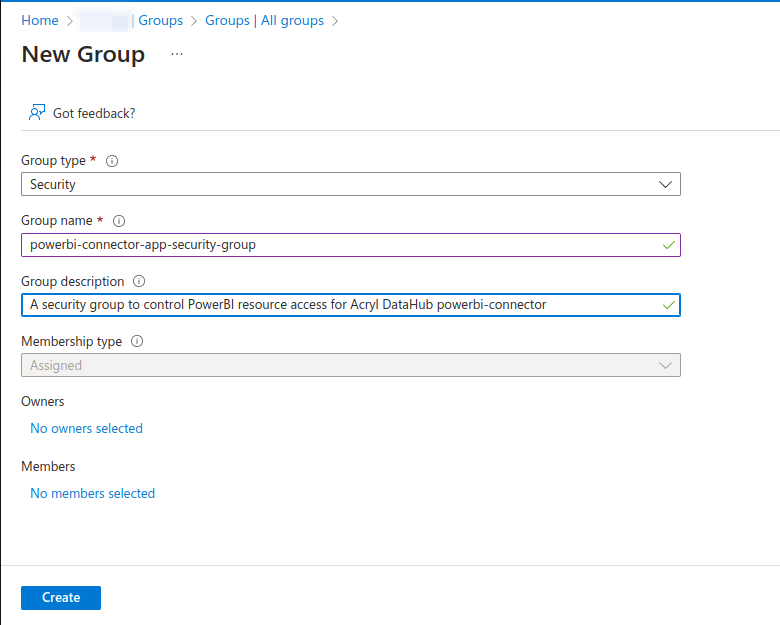
d. On
New groupwindow click onNo members selectedand addAzure AD appi.e. powerbi-connector-app as memberf. On
New groupwindow click onCreateto create the security grouppowerbi-connector-app-security-group.Assign privileges to powerbi-connector-app-security-group: You need to add the created security group into PowerBI portal to grant resource access. Follow below steps to assign privileges to your security group.
a. Login to https://app.powerbi.com/
b. Go to
Settings->Admin Portalc. On
Admin Portalnavigate toTenant settingsas shown in below screenshot.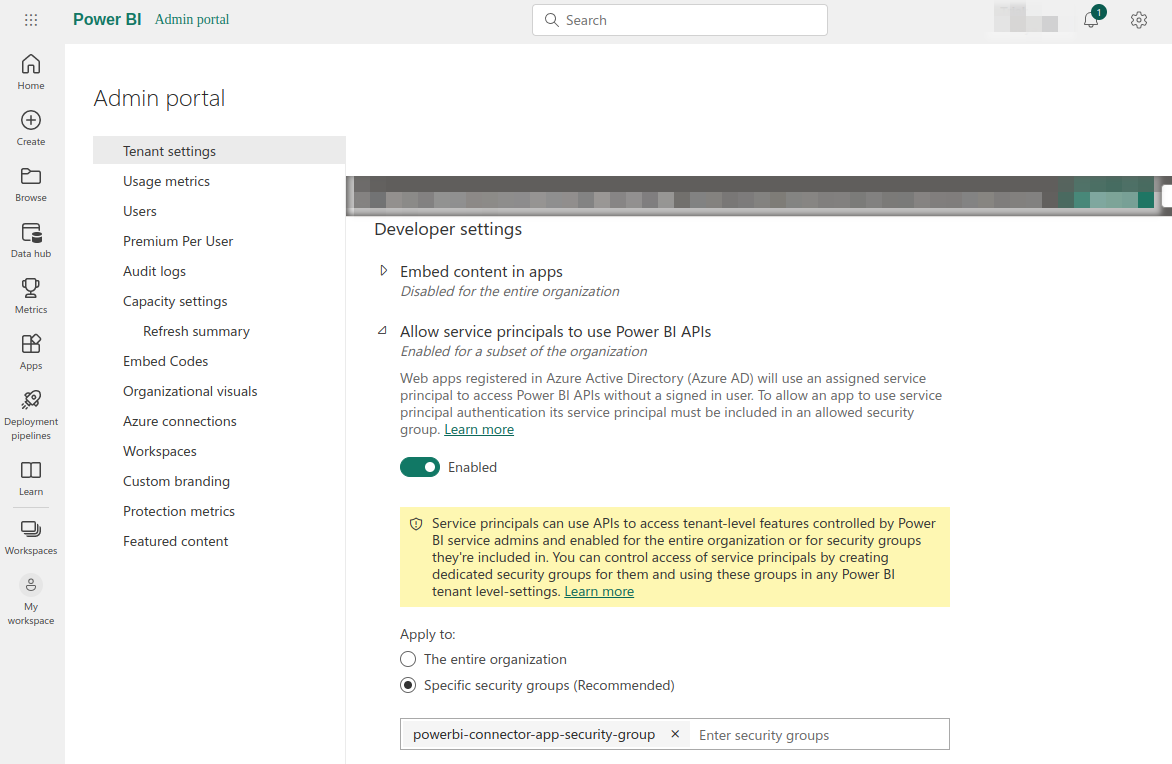
d. Enable PowerBI API: Under
Tenant settings->Developer settings->Allow service principals to use Power BI APIsadd the previously created security group i.e. powerbi-connector-app-security-group intoSpecific security groups (Recommended)e. Enable Admin API Settings: Under
Tenant settings->Admin API settingsenable the following optionsAllow service principals to use read-only admin APIsEnhance admin APIs responses with detailed metadataEnhance admin APIs responses with DAX and mashup expressions
f. Add Security Group to Workspace: Navigate to
Workspaceswindow and open workspace which you want to ingest as shown in below screenshot and click onAccessand addpowerbi-connector-app-security-groupas member. For most casesViewerrole is enough, but for profiling theContributorrole is required.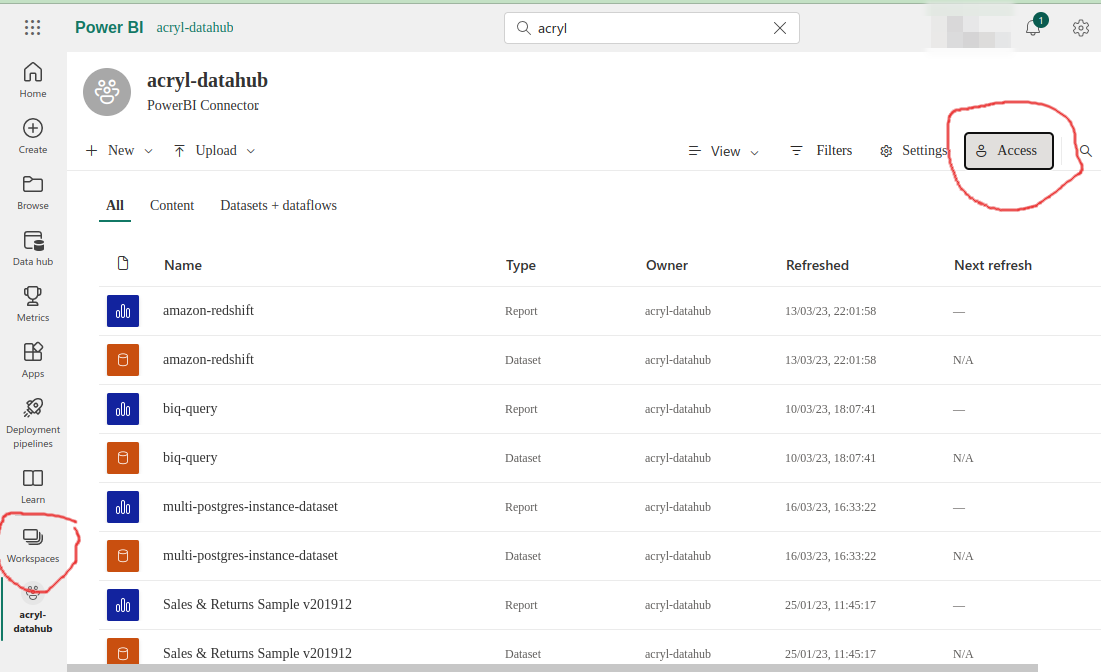
Next Steps
Once you've done all of the above steps, it's time to move on to configuring the actual ingestion source within DataHub.