Configure Slack For Notifications
Install the DataHub Slack App into your Slack workspace
The following steps should be performed by a Slack Workspace Admin.
- Navigate to https://api.slack.com/apps/
- Click Create New App
- Use “From an app manifest” option
- Select your workspace
- Paste this Manifest in YAML. Suggest changing name and
display_nameto beDataHub App YOUR_TEAM_NAMEbut not required. This name will show up in your slack workspace
display_information:
  name: DataHub App
  description: An app to integrate DataHub with Slack
  background_color: "#000000"
features:
  bot_user:
    display_name: DataHub App
    always_online: false
oauth_config:
  scopes:
    bot:
      - channels:read
      - chat:write
      - commands
      - groups:read
      - im:read
      - mpim:read
      - team:read
      - users:read
      - users:read.email
settings:
  org_deploy_enabled: false
  socket_mode_enabled: false
  token_rotation_enabled: false
Confirm you see the Basic Information Tab
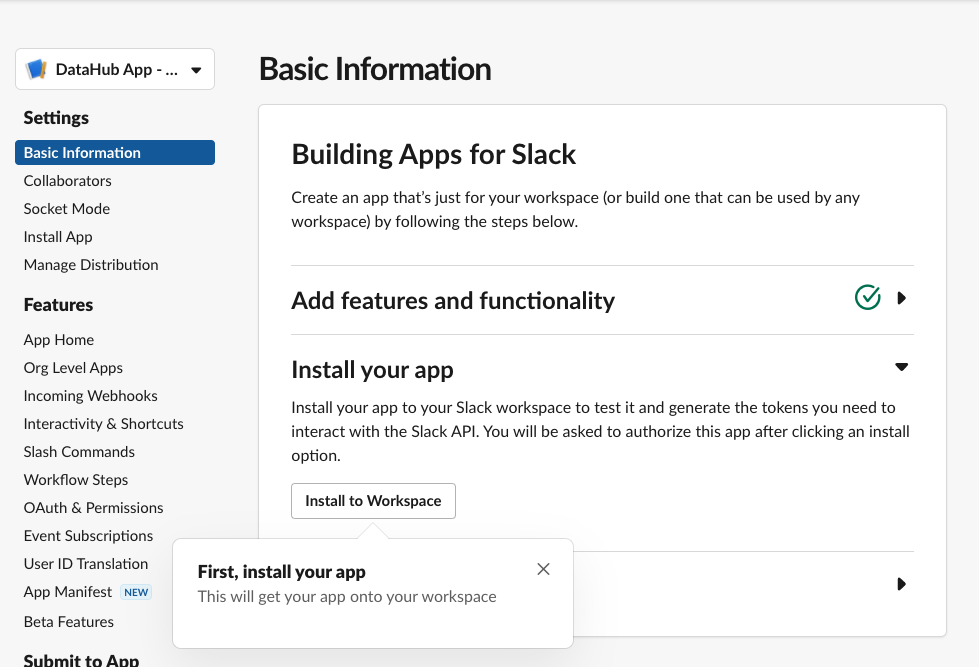
- Click Install to Workspace
- It will show you permissions the Slack App is asking for, what they mean and a default channel in which you want to add the slack app
- Note that the Slack App will only be able to post in channels that the app has been added to. This is made clear by slack’s Authentication screen also.
- Select the channel you'd like notifications to go to and click Allow
- Go to DataHub App page
- You can find your workspace's list of apps at https://api.slack.com/apps/
Generating a Bot Token
- Go to OAuth & Permissions Tab
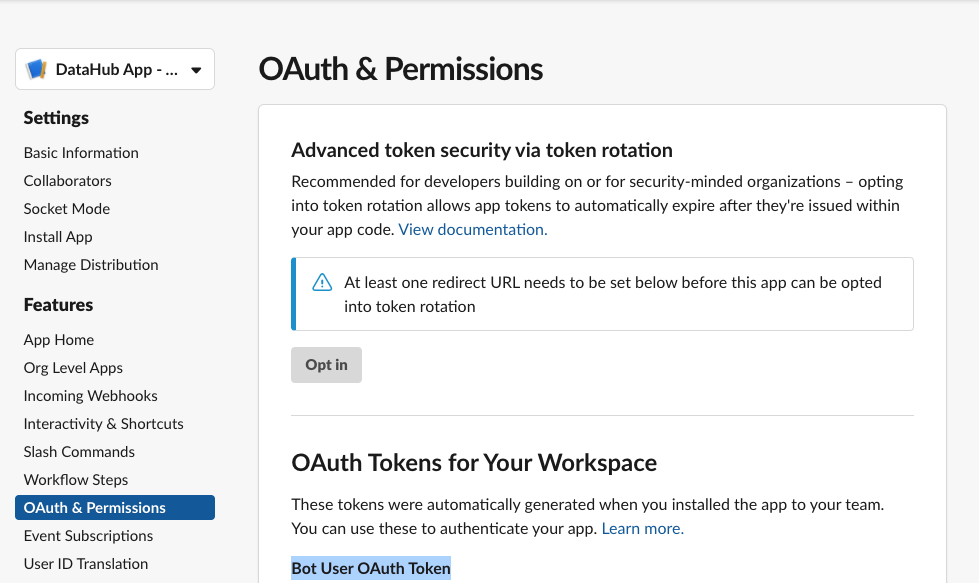
Here you'll find a “Bot User OAuth Token” which DataHub will need to communicate with your slack through the bot. In the next steps, we'll show you how to configure the Slack Integration inside of Acryl DataHub.
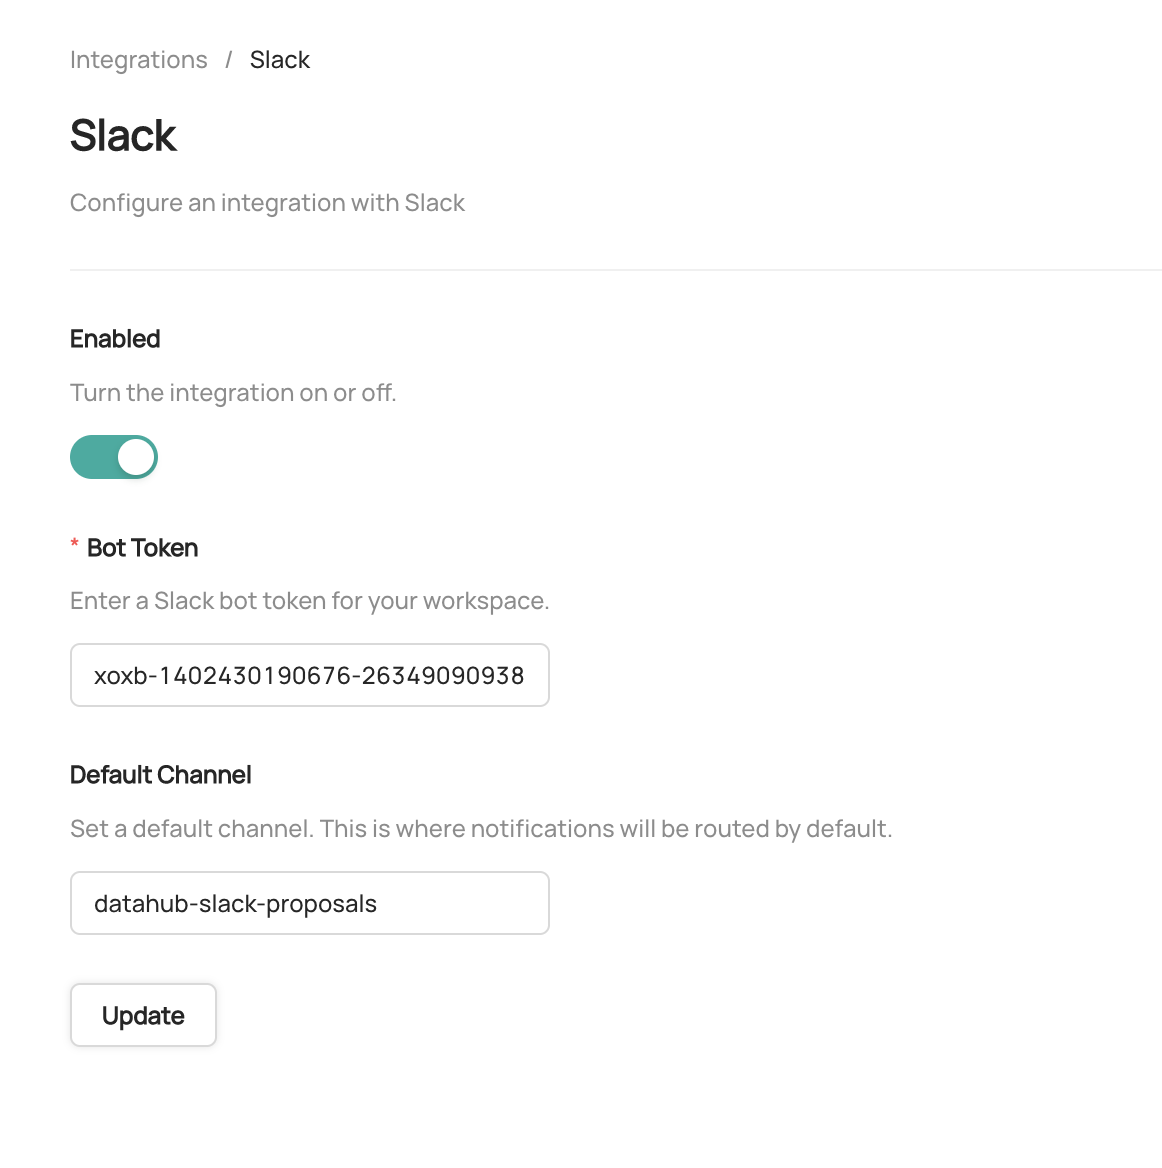
Configuring Notifications
In order to set up the Slack integration, the user must have the
Manage Platform Settingsprivilege.
To enable the integration with slack
- Navigate to Settings > Integrations
- Click Slack
- Enable the Integration
- Enter the Bot Token obtained in the previous steps
- Enter a Default Slack Channel - this is where all notifications will be routed unless
- Click Update to save your settings
To enable and disable specific types of notifications, or configure custom routing for notifications, start by navigating to Settings > Notifications. To enable or disable a specific notification type in Slack, simply click the check mark. By default, all notification types are enabled. To customize the channel where notifications are send, click the button to the right of the check box.
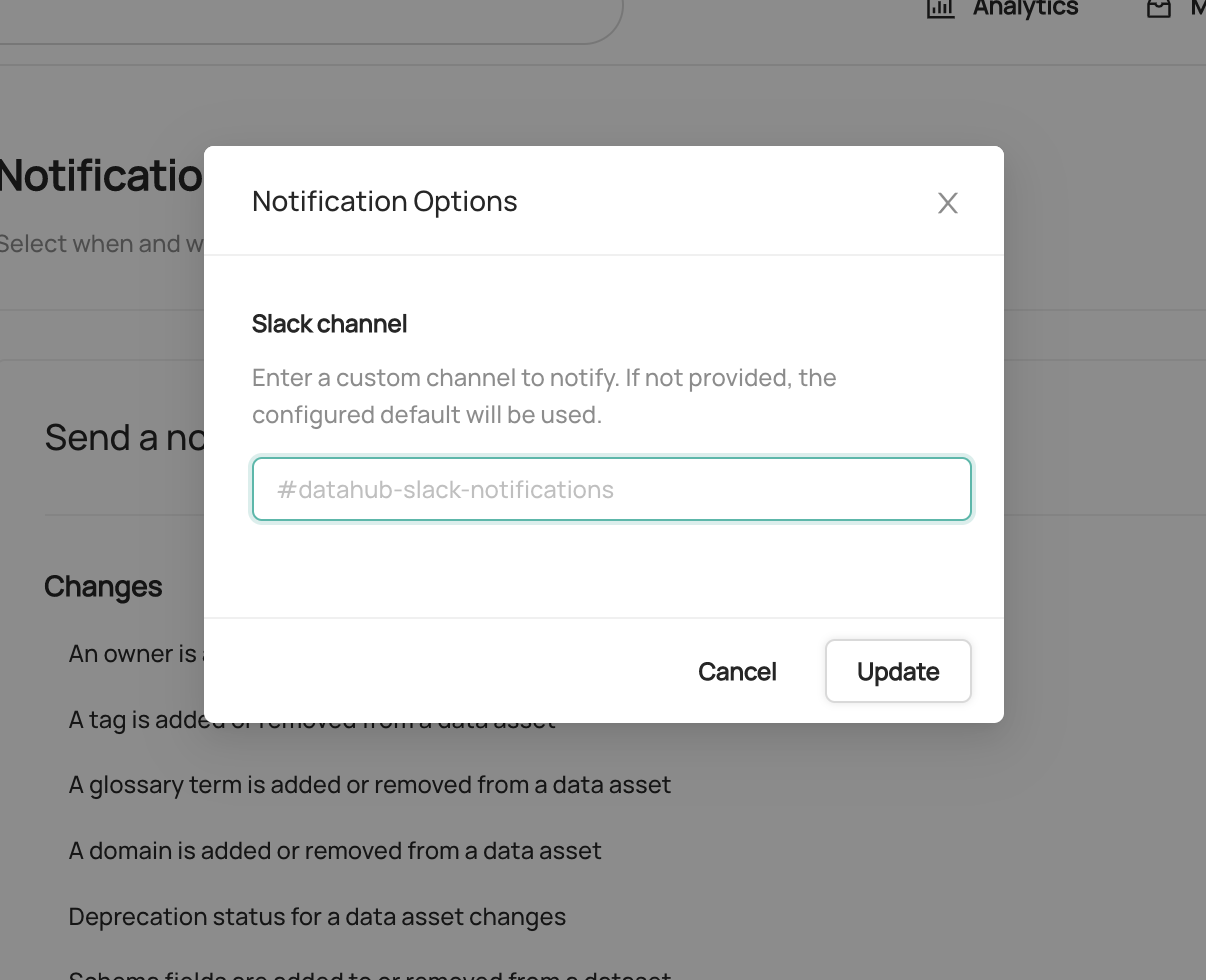
If provided, a custom channel will be used to route notifications of the given type. If not provided, the default channel will be used. That's it! You should begin to receive notifications on Slack. Note that it may take up to 1 minute for notification settings to take effect after saving.
Sending Notifications
For now we support sending notifications to
- Slack Channel ID (e.g.
C029A3M079U) - Slack Channel Name (e.g.
#troubleshoot) - Specific Users (aka Direct Messages or DMs) via user ID
By default, the Slack app will be able to send notifications to public channels. If you want to send notifications to private channels or DMs, you will need to invite the Slack app to those channels.
How to find Team ID and Channel ID in Slack
- Go to the Slack channel for which you want to get channel ID
- Check the URL e.g. for the troubleshoot channel in OSS DataHub slack
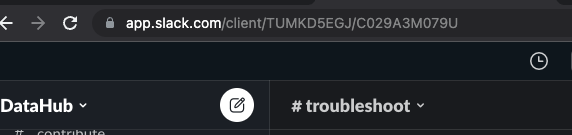
- Notice
TUMKD5EGJ/C029A3M079Uin the URL- Team ID =
TUMKD5EGJfrom above - Channel ID =
C029A3M079Ufrom above
- Team ID =
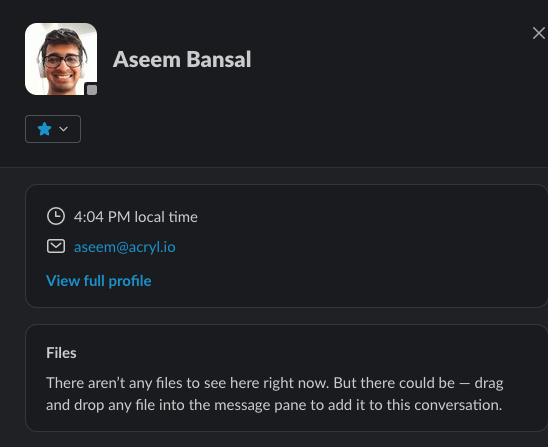
How to find User ID in Slack
- Go to user DM
- Click on their profile picture
- Click on View Full Profile
- Click on “More”
- Click on “Copy member ID”